How to Install Showerwall

Installing Showerwall panels is a simple and effective way to waterproof your bathroom while adding a sleek, modern finish. Each of our collections comes with a comprehensive installation guide that walks you through every stage — from preparing your tools to sealing the final fixtures.

Installation Guides

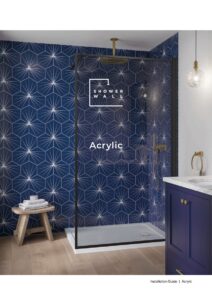
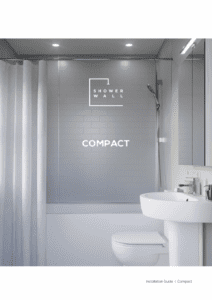
Our latest Showerwall Installation Guides provide all the information you need for a professional-quality finish. For your convenience, a downloadable PDF guide is available for each Showerwall collection on this page.

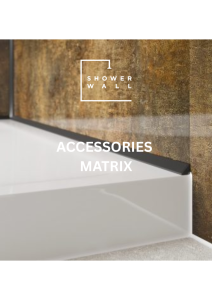
Before you begin, ensure you have all the required tools and Showerwall accessories to complete the Showerwall waterproof system. To make this easy, we’ve created a handy accessories matrix that details the exact quantity and type of accessories you’ll need for each panel type.

Installation Videos

For a quick visual overview, explore our installation videos, which demonstrate the step-by-step fitting process and reflect Showerwall’s commitment to professional standards.

These short videos highlight:

  • The advantages of each panel material
  • The tools and products required
  • How quick and easy it is to fit laminate panels around a bath or acrylic panels within an enclosure

Important Information

To ensure the best results — and to maintain the validity of your guarantee — it’s essential to follow all installation instructions carefully. Failure to use the recommended Showerwall sealant and adhesive or to follow our guidelines may invalidate your guarantee and could result in issues such as:

  • Panel delamination
  • Bowing or warping
  • Colour fading
  • Visible protrusion across panel joints

Final Checks

Before installation, inspect all panels thoroughly, regardless of decor type. If you notice any defects or concerns, please contact us before proceeding with the installation.

Showerwall Acrylic Installation – Enclosure

Showerwall Laminate installation – Over a Bath

Showerwall Installation Guide

Showerwall can be fitted by anyone who is DIY competent. Simply cut the Showerwall panels to size and fix them to the wall or over existing tiles.

The Showerwall installation video guide demonstrates the method of panelling walls in a bathroom with Showerwall panels. Alongside this video, please ensure that you have a copy of the Installation Instructions to hand during the fitting process to refer to at every stage.

Steps To Install Showerwall Panels

What you’ll need: 

  • Handsaw, jigsaw or circular saw
  • Hacksaw
  • Drill
  • Hammer
  • 1200mm spirit level 
  • Sealant gun
  • Suction cups
  • Tape measure 
  • Everything else you need is included in the shower wall installation kits.


  1. Prepare the area where the shower wall panels will be fitted, ensuring the walls are clean, degreased, and free from dirt and dust.
    • Check the walls are flat and plumb with the spirit level. 
    • If they are not, treated buttons must be used as a fixing method; more details are available in the installation instruction leaflet. 
    • It is important to check and ensure that the shower tray is also located level using your spirit level. 
  2. Once the walls are prepared, start by measuring the shower tray to determine the lengths of Sureseal strips required.
  3. Insert the Sureseal strip, complete with face capping attached, into the supplied mitre box. 
  4. Cut the required 45-degree internal corner angle and notch the end to accommodate the internal corner trim with a hacksaw. 
  5. When both Sureseal strips have been cut and mitred, they can now be placed onto the shower tray to check the mitre cuts and notches match up.
  6. With the first strip in position, lightly mark the shower tray with a pencil to define the front edge of the Sureseal strip.
  7. Apply an ample bead of shower wall sealant into the underside channel of the Sureseal strip
    • Make sure the cavity is completely filled with sealant. 
  8. Lay a straight line of shower wall sealant on the shower tray inside the pencil lines that you previously marked
    • This will be a guide to the Sureseal strip’s outer edge.
  9. The Sureseal strips should now be placed into position on the shower tray. Use shower wall sealant on the mitered joint to fuse together.
  10. Use countersunk screws or nails to secure the Sureseal strips to the wall.
  11.  Fix the internal corner trim to the wall using shower wall adhesive
    •  It’s essential it is straight and plumb, so check using the spirit level.
  12. Take measurements for the height and width of the panel required, taking the measurements from the top of Nib A on the Sureseal strip to the ceiling.
  13. Remove the protective film from the face of the panel and check there are no imperfections or issues with it.
    •  If there are any concerns at this point, contact your supplier and advise and clarify those concerns before proceeding. 
    • If there are no concerns with the panel, double-check your measurements and then mark the shower wall panel and cut to the correct height and width. 
    • You will also need to ensure that any holes required for pipes or shower heads are made at this point, allowing an extra three millimetres in size to accommodate a three-millimetre expansion gap. 
  14. Place the panel in position to ensure it’s the correct size, to confirm a three-millimetre gap is left at the top edge of the panel and around any cutouts & to familiarise yourself with how the panel will be placed into the Sureseal strip channel and be slid into the corner trim before adhesive and sealants are applied.
  15. Apply a generous bead of shower wall sealant into the entry and fit it to the left-hand edge of the panel
    • Ensure that the sealant spreads around the panel edge. 
    • Wipe off any excess sealant as required. 
  16. Apply a generous bead of shower wall sealant into the left-hand channel of the internal corner trim. 
  17. Run a continuous bead of shower wall sealant into the Sureseal strip channel, filling it completely to the height of the channel.
  18. Apply generous amounts of shower wall adhesive to the wall or directly to the panel using lines or zig zags.
  19. Install the panels onto the Sureseal strip, ensuring it drops fully into the base channel and slide it into the internal corner trim profile. 
    • The sealant should ooze up and over the top of the Sureseal strip along the full width of the panel.
    • Remove excess sealants from the top edge of the Sureseal strip using the shower wall sealant profiler. 
  20. Repeat this process for the second panel
  21. Locate the front capping into the Sureseal strip and firmly push it in place along its entire length. 
    • There should be multiple click sounds as the cap barbs locate into place. 
    • When fully located, the top edge of the capping should now be fully flush with the face of the shower wall panel with no gaps along its top edge visible.
    • There should also be no gaps visible along the bottom edge of the capping where it sits on the shower tray. 
  22. You can now affix the end cap. 
  23. Any holes you’ve made for pipes or shower heads must be fully sealed by applying the shower wall sealant around the fixtures and fittings. 
  24. Leave for 24 hours for the sealant and adhesive to set, and then it’s ready to use.